To join this site and get updates on new articles click on the “join this site” button on the bottom of the page. Through this site you can follow me on trips, modifications, product reviews, etc. Please feel free to comment, make requests, or ask questions on any post. If you've found this site enjoyable, or perhaps saved yourself some money and would like to make a small contribution to help pay for the server and maintenance costs please click on the "Donate" button. Enjoy, ride safe, and keep your knees in the breeze. -Jared

Showing posts with label mods and accessories. Show all posts

Product Review- Viking Century Trunk


Several years ago I removed the back seat and sissy bar from my motorcycle to give it a cleaner look. I love how it looks but have had a difficult time find a bag or trunk that would fit securely and also allow for easy access to the stuff inside while secured. In the process of looking for the perfect bag I came across the Viking Century Trunk bag. The bag was priced more than reasonable and having ordered from Viking in the past, I knew that their customer service was bar none. Go check them out, if you haven't already!

http://www.vikingbags.com/motorcycle-luggage.htm


When the bag arrived, I could tell it was good quality. The leather and stitching was high quality and the bag was solid and reinforced. Doesn't look like there's any chance of it sagging overtime. A couple side pockets and an organizer inside out to help keep small items from disappearing at the bottom. The bag is also lockable, which is uncommon for leather bags, but awesome for anyone carrying expensive equipment or gear. 
Yesterday I finally got a chance to test it out for the first time (there's been snow on the ground) and I am more than pleased with the bag. It mounted on to the bike with a small strap around the rider backrest and two bungies strapped to the fender struts. It took no longer than a minute to secure it to the bike. After the bag was secured, I packed some camera equipment and some extra gear and headed east into the Colorado plains to watch the sunset over the rockies. The bag didn't shuffle or adjust at all during the ride. Although I didn't have a lot of weight in the bag, it was completely unnoticeable throughout the riding. 
http://www.vikingbags.com/motorcycle-trunk-bags.htm
After getting to my turn around point, I decided to take some pictures and the bag allowed me easy access without removing from the bike. The was an important key for me. I have had other duffle type bags that mounted to the rear fender, but they always required removal to access the main compartment. This was not the case with the Viking Century Trunk. 
jmgantphotography.com
Two snaps on the lid and a little loosing of the velcro and the bag opens freely to the 2050 cubic inches of storage capacity.

I plan on buying some pluck foam to line the inside with for carrying camera equipment. On top of it being secured to the bike, it's important to me that the gear inside stays safe. So, on top of it being lockable, I'm pleased to see in addition to the over hanging lid designed, secured with velcro, the bag comes with a water-proof cover. It claims to be 100% waterproof and from my brief testing with a garden hose, I don't have any doubts.

Overall, I love this bag. I really don't have anything negative to say about it. When the bag first arrived, the set of keys were missing from the package, but after contacting the vendor, everything got taken care of.
Product Details:

  • Dimension: 18''x12''x9'' 
  • Capacity: 2050 Cubic Inches 
  • Made of Long-Lasting Viking Leather
  • 100% Water-proof
  • High quality stitching
  • Velcro air tight closure
  • Extra clean appearance to match your motorcycle, seat, saddlebags and riding apparel
  • Smooth and Sleek plain design tail bag
  • Lockable buckles
  • Reinforced body prevents sagging and long lasting wear
  • Body structure remains intact full or bare
  • Top transport handle and detachable shoulder strap included
  • Can be mounted in multiple ways: attaches to sissy bar, rack or atop passenger seat
  • Also includes a comfortable sissy bar strap and two adjustable bungee straps, four durable chromed D-rings and several strap openings
  • Body designed protects personal items from harsh weather and other Hat-box style lid with long sides for protection against weather, grime and other factors
  • Top opening for easy access
  • Two side pockets for smaller items and fast convenient access
  • Internal mesh pocket for extra storage and organization
  • Universal fitting


  • Motorcycle House - New gear coming!


    Have you guys heard of this place? Wow, seriously affordable motorcycle gear and we'll soon find out about its quality. I haven't order motorcycle gear for a while, but have a leather trunk and jacket coming my way that I plan on doing a thorough review on, so stay tuned!

    What type of products would you guys like to see reviewed?

    In the mean time, go check this place out and tell me what you think!

    http://www.motorcyclehouse.com/motorcycle-apparel.htm

    Quick Action Throttle on a Cruiser

    Do you want just a little more umph for basically free? For those familiar with the sport bike and dirt bike scene, a quick action throttle is nothing new. It's essentially a throttle tube with a wider diameter cam. The advantages of this is that the distance that the throttle has to turn to achieve full throttle lock is shorter, giving you a more sensitive throttle and in many cases better throttle control.
    There was a lot of talk of a "custom throttle" on the forums and after just a bit of investigating I realized that quick action throttle is what dozens of people were paying someone (claiming it was an original idea) to do to their throttle tube.

    Well tinkering as much as I do, I decided I wanted to see what all the hype was. Again, it's not an original idea. It's been done for year, but just not commonly done on a cruiser throttle tube.

    What I did is purchase a 1" PVC coupler at Lowes. Only cost me $.34. Cut a end piece off the same width as your throttle cam. With a dremmel, sand it down just a bit to get the size and smooth edges you want and carefully fit it onto the throttle cam. If it fits well, sand it down to the size/diameter you want (larger the more sensitive throttle and make sure your throttle housing has enough room). With just a small amount of epoxy, glue it into place. Once the appoxy has dried, take some 250-400 grit sand paper and smooth it down evenly. Re-install you throttle and go for a ride.

    I have found that the throttle is smoother, and less jerky on take off. A great modification, especially when considering the price.

    For more ideas, google "Quick Throttle Mod".


    Ape Hangers on a Vulcan 1600 Nomad - 11" Santee Dresser Apes

    (11" Santee Dresser Bar. I am 5'9")
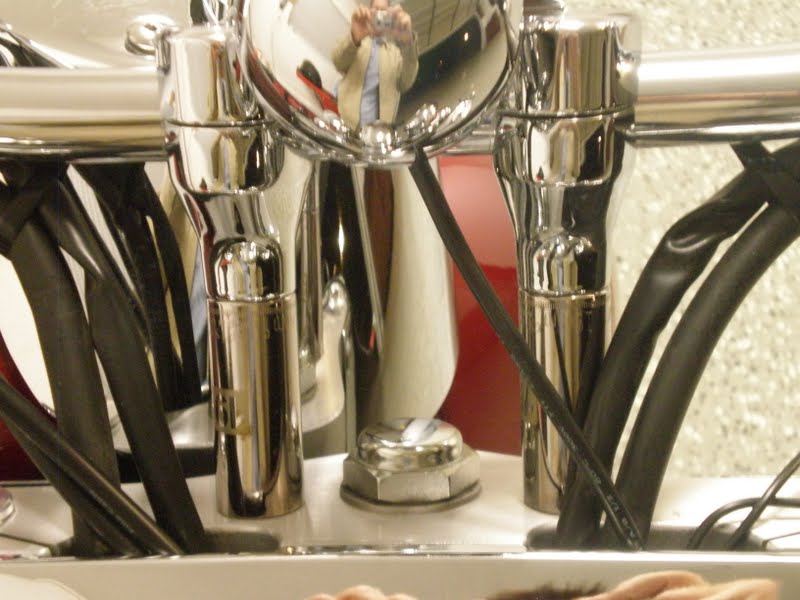
    With the addition of a Hoppe fairing, taller risers were not an option, so I started looking for different handle bars that might provide a similar pull-back and rise as the Scootwork PhatII risers. I have always been a bit intrigued with the look of ape hangers, so this is the route I decided to go.
    I decided to to go with the 11" Santee dresser apes. The dresser style would give me the additional pull back that I wanted for comfort while staying true to the look of apes. I also chose these bars so that I didn't have to replace all my cables and lines. So far I am very pleased.

    How to run the wiring internally:
    Drape a few towels over your tank, front fender, etc.

    Open up the headlight assembly and follow the handlebar wiring for the switch housings to the 3 plugs. There is one plug for the right side and two on the left. Unplug them from the main wire harness and gently pull them out of the back of the headlight. Remove the switch housings from the bars and the wiring should be free.

    Cut the shrink tubing off, exposing all the wires that need to be extended. The headlight circuit is a 10 amp fuse, so I used 18 ga.

    Cut 16, 15" extension wires and mark them all differently (e.g. by putting different color/quantity sharpy marks on them). Each wire will be assigned to a specific wire in the harness that you will be cutting. It is extremely important that you write down ALL the colors of the wires and assign them to one of the 16 wires that you have marked (stock red and black wire with silver dots on the black=extension wire that I've marked with two black dots, for instance). Be very thorough or you will have a hard time knowing what connects to what.
    Now with everything marked and written down, begin cutting the wires, staggering your cuts by about 1.5". The staggered cuts will keep the wires uniform and prevent there from being a big bump, which would make pulling them through the bar more difficult. The right side only has 5 wires, but the left side has 11, so it's super important to look at all the wires and space them evenly.
    Making sure you match the marked extension wire with the correct stock wire, strip about 1/3" off the ends, overlap them and twist them together. Don't twist them upward/side by side and then fold over because this will make your joint larger than necessary. Now solder the ends together. If you don't know how to solder, don't be scared. It's a lot easier than you'd think. Don't attempt to do this with wire crimps. If they come apart inside your bars, you'll be hating life.

    After the solder has cooled, give the wires a good tug to make sure they aren't ever going to come apart. If everything feels secure, slip a piece of 1/8" shrink tubing over the solder joint (don't use electrical tape!) and heat it with a heat gun or hair dryer. Repeat this on all 16 wires. Again, make sure that you are connecting the correct extension and that it is written down correctly.Now it's time to pull the wires through the bars. If your bars didn't come with a pull wire in them, tie a string to a bolt and drop it in at the top, shaking the bars until it falls out the bottom, giving you a pull string. Attach your pull wire/string to your new extended wires by wrapping a thin amount of tape around the end of the wires and connecting your pull pull wire/string to it. Then gently pull from the bottom, while pushing and feeding from the top until the wires come out. If you're installing Z-bars, this may be a bit tricky and you may need to lube your wires with baby powder or grease.Once both sides of wires have been pulled through, go drink a beverage of your choice. You're over half way done!

    Remember that paper where you wrote down which extension goes with which wire? It's now time to make those connections. Before you forget, slide a piece of shrink tubing over each of the wires before you solder them. Strip the ends, twist and solder the same way as you did previously. Heat the shrink tubing and bundle up the wires with tape or zip ties to keep them organized.

    Remove the master cylinder reservoirs, levers, grips, and anything else you may have on your bars (if you haven't already) then remove your old handlebars. Now mount your new handlebars and feed your new wires back into the headlight the same way they came out. You'll most likely have excess length, so just clean it up with zip ties, then plug the wires back in.

    Remount your headlight, master cylinder reservoirs, levers, and grips. There is a good chance you will have to reroute your front brake line to the rear of your triple tree. I had to do this, but plan on buying a longer line to go from the splitter to the reservoir in the future, so I can move it back to the front of the triple tree.

    Now, with everything put back together, start the bike and make sure everything is working. Check the blinkers, horn, brake light, high-beams, etc. If something is not working check your fuses and replace any that may have blown. If they keep blowing out, you may have an exposed wire that is shorting out. Good luck finding it! This was my worst fear with mine, but it all turned out ok and everything looks and feels great.


    Risers on a budget


    What you'll need:
    1. Two 19mm sockets (your choice of how deep. 2.5" deep sockets are shown)
    2. Two 3/8" (grade 8) bolts. (The length depends on socket depth. Measure the stock bolts and add the depth of the sockets to determine the correct length)
    3. Two 3/8" lock washers
    4. Two 3/8" self-locking nuts
    5. Red Lock-Tight
    Installation instructions:
    1. Place towels over your tank and fender to protect them and then remove the chrome caps and loosen the 8mm Allen-head bolts on the top clamp of the risers. Once the upper riser clamp is completely removed, carefully place your bars on the tank.
    2. With a 17mm socket (helps if you have an extension), remove the nut directly under each riser on the bottom side of the upper triple tree clamp. After the nut is removed your riser will be off.
    3. Remove the 17 mm bolt inside the risers and replace with your 3/8" bolt. With the bolt going through the riser, socket, and the triple tree clamp. Tighten it with the washer going on first and then the Lock-Tight-coated nut. Tighten and put the bars and upper clamp on the same way as they came off.


    Irate Custom Radiator Grills

    I recently had the opportunity to meet with Martin Mcallister, the owner of Irate Customs. This company makes beautiful, extremely detailed, custom radiator covers/grills.

    If you are wanting to add a little shine to the front of your bike, check out his products!

    Irate Grills is offering discounts now! Send me a message and I'll give you the information needed!

    www.iratecustoms.com/

    Hoppe Industries - Quadzilla Fairing


    My newest Nomad came with a fairing. When I purchased the bike, I wasn't positive what brand it was but, after a bit more investigating, I've found out that it is a Hoppe Industries Quadzilla fairing.

    The Fairing fits the bike perfectly, like OEM equipment, using the same mounts as the windshield it replaces. Mine features four 5-inch, marine grade, chrome speakers that match the loads of chrome I've added to the bike. The stereo is a cheap, Eclipse, 50 x 4-watt stereo that sounds good but tends to skip on bumpy roads. I do plan on replacing it with one that has a USB port when funds allow. I also have 3 shields of different sizes and tints. I currently am using the shortest (5"[?]), solid black shield which looks great and still provides great protection for my 5'8" stature. I also have the solid chrome windshield strip that breaks up the fairing and the shield nicely.

    One complaint I have with this fairing is how the inner and outer fairing meet together. Their edges don't match up perfectly and, although it must be close enough for 99% of people out there (Hoppe has won a number of awards for these fairings), I'd like to see them match up perfectly so that a single piece of door edging could seal both edges together.


    This fairing package new would cost over $1900, which seems rather steep. I am glad it was already on the bike when I bought it. It was actually the main reason I bought it.


    Jared M. Gant

    Proformance air Intake


    There are several different types of air intakes but they tend be rather pricey, generally around $250-$300. I had modified my intake slightly on my first Nomad, but it provided little, if any, performance improvement.

    I didn't care for the looks of the hyper-charger, nor the tornado/spiked air kits, and I had pretty much decided to go with a Barons Big Air Kit, until I heard of Joe Norris and his kits. Joe Norris (CHUCKSTER)is a machinist who makes beautiful custom accessories.

    I decided to get Joe's double, and then later went with his single plate kit. The double plate kit allows you to continue to use the stock "dog bowl" cover, and is a bit quieter, but the single plate is more free flowing and more custom looking.

    For $100 this intake is an amazing value and adds a tremendous performance increase to the bike.

    To check out more of Joe's stuff, go to http://www.chucksterscustoms.com/Products


    Jared M. Gant

    Customizing MY Nomad- Part one

    BEFORE

    While I was shopping for my most recent Nomad I was looking for one that a few specific accessories-mainly a full fairing. My newest Nomad is a 2006 (17,000 miles) with the fallowing accessories already added:


    • Hoppe Industries Quadzilla fairing with chrome package

    • Vance and Hines exhaust

    • Cobra light bar

    • Top and bottom saddlebag rails

    • Some cheapo highway pegs (sold)

    • Mutazu trunk (for sale-make me an offer!)

    The day I got the bike home I started to pull the bike apart, order accessories, make modification and catch the bike up on maintenance, which had been somewhat overlooked.

    The biggest change I will be making to the bike is painting it. After having a custom paint job, it's difficult to go back to stock paint. After much thought I have decided to got with House of Kolor, Kandy apple red- like my last Nomad- but with some dry metallic flakes mixed into the mid coat. The metallics will give it more pop in direct sunlight.

    Accessories I've added or have ordered and have on its way:


    • Harley Davidson king tour pak

    • New front a rear tires

    • 3 piece mustang seat (from previous bike)

    • Ultimate baffles

    • Tubular solo rack

    • New speakers for the fairing

    • Chromed inner engine cover

    • Chromed drive shaft cover

    • Chrome choke nob and other small odds and end

    • Spike axle tips

    • Kuryakyn ISO grips with stiletto tips

    • Custom hidden key

    • Kuryakyn off set highway pegs

    • Kuryakyn turn signal bezels

    • Shock balance kit

    • Garmin gps with ram mount

    • Kuryakyn Voltmeter

    • Throttle flip lever

    • Fuse block

    • Additional driving lights

    • Multiple replacement shields, all different tints and heights

    A few more things that I will add soon:


    A few things I am looking for:


    • Chrome water pump cover

    • OEM lowers (yep, the previous owner tossed them in the trash....?)
    Maintenance I'll be doing soon or have done:


    • Clean and re-gap plugs

    • Lubricate drive shaft and swing arm

    • Correctly wire accessories

    • Final drive oil

    • Clutch fluid

    • Brake fluid

    • New tires

    Spiked Axle Caps

    SPIKED AXLE CAPS

    I had been looking for a nice way to dress up the axle bolts on my Kawasaki Nomad. I searched around online and couldn't find anything that I like, so I've made some. These are designed to work specifically with hollow axles, which are on many metric models


  • Material: High quality anodized billet aluminum
  • Condition: 100% Brand New
  • Easy installation! Screw directly into your existing axle.
  • Color: Polished

  • These axle tips are $85 shipped within the U.S.A. and $100 to Canada.

    I accept Paypal and checks. The axle tips will not be shipped until the money clears.

    Please email me at jaredmgant@gmail.com if you would like to place an order.


    Jared M. Gant

    Kawasaki Nomad: House of Kolor, Kandy Apple Red

    The paint job is finally finished. I really enjoyed tackling this project, but doubt I will try something of this magnitude again anytime soon. I believe this is the only Kawasaki Nomad painted candy apple red.

    A BIG thanks to Ori Martin for allowing me to use his paint booth, Travis Olsen for answering my hundreds of questions, and Jed Menlove for helping me spray the paint!


    Nomad Make-over

    During my 2009 riding season, I toyed around with the idea of painting my bike. When the season started to slow down, and I didn't have any riding plans, I decided that I would post my bike for sale to see what would happen. My thoughts were that if I could sell it for what I was asking for, it would be worth it. If not, I would paint it and catch up on some maintenance. After 11 days, it sold.

    I have ridden many different types of bikes (Honda-VTX 1300, VTX 1800, Fury, Gold Wing, Aero, Spirit, Rebel, Kawasaki- Nomad, 1600 classic, Mean Streak, Vulcan 2000, Vulcan 900, Vulcan 800, Harley V-rod, Sportster, Street Glide, Suzuki Boulevard C50, Yamaha Raider) and I feel that the Nomad is the best bike for my current riding style. After selling my 2005, I purchased a nicely accessorized, 2006 Nomad, with next to no miles on it, down in Phoenix. The color was green and silver. Although I got a lot of compliments on the colors, they weren't what I wanted and stock paint sucks!

    My winter project is to redo my Nomad. I stripped off a few of the accessories that weren't what I wanted and sold them (1500 Nomad front fender tips, F&S luggage rack, Saddlebag strips, F&S tank bib). The things that I would like to do (I will update this post through out the winter as I accomplish these things) are:
    -Re-paint the bike
    -Add a clear fender protector
    -Add a chrome inner engine cover (Done Dec. 2th)
    -Add a chrome drive shaft cover (Done Nov. 20th)
    -Add a Cobra luggage rack (Done Nov 2oth)
    -Put studs and conchos on the pillion backrest
    -Switch the non-studded Mustang seat with a studded one
    -Add an open air intake system (Done Nov 5th)
    -Make a lay-down license plate mount.
    -Add lower bag rails (Done Nov 15th-$60)
    -Make larger lower deflectors
    -Add Vista Cruise control (Done Nov 2oth-$15)


    Stripped of all paintable parts

    Drive shaft cover. Design for the vulcan 1500 and modified for the Nomad.

    The tank's all ready for some paint.One of the challenging things that I will be doing to my bike is removing the brushed aluminum accents off the saddlebag doors and filling the indentions with a plastic filler. I really like how the smooth doors look below.


    UPDATE 12-28-09
    Several weeks have gone by and I haven't been able to do much work due to my schedule. I have the week off and I will hopefully be getting everything done. Today I sprayed the primer on the parts that had body work done

    The fender came with a chrome trim. I really liked the way it looked but, since the previous owner didn't really do the research to find compatible trim, I was not able to find the same trim tips for the rear fender. I decided to remove the trim, weld the holes shut and fill them in. Eventually I might get the correct tips for my bike, but for the time being, I'll leave it how it is.
    The original paint was a two-tone and I had to sand away the vinyl pinstripe. I was concerned that a little line might show where the pinstripe was, but luckily the primer is covering any trace of sanding.
    The front fender is showing a line where the pinstripe was, so tomorrow I'll have to spend some time sanding it.
    The doors originally had three aluminum stripes each. I wanted the doors to look smooth and clean, so I removed these. I had to fill the holes where the stripes were with an epoxy-type product (SEM 39767, Problem plastic repair) and then, afterward, filled and glazed the surface. It now looks as smooth as can be with no signs of the stripes.
    12-29-2009

    Today I finished spraying everything. I got to the shop bright and early and sanded down everything that I primed yesterday. The bike took a lot of work to sand because of all the little nooks and crannies. After I had the primer sanded, I sprayed one good coat of sealer over everything.

    After the sealer dried, it was time for the base coat. BRIGHT METALLIC GOLD (Solar Gold BC01)! My bike did not look its best in gold. I sprayed four coats of the House of Kolor Gold base. After the base dried, a friend of mine came and helped me spray five coats of House of Kolor KANDY APPLE RED KBC11. As soon as the red started to thicken I knew it was the right color. After that came three coats of clear (transtar) and I was done. It was a 13-hour work day, but I got all the painting done in one day, so I think it was worth it.

    The pictures from a computer screen look like crap and don't do it any justice.

    1-1-10
    The bike is mostly put back together. I'm going to let the paint cure a little longer while I search for some sort of fender protector to put under the pillion seat before putting the seat back on. I really like how the bike looks when set up with the single seat and I don't want the pillion seat to leave marks on the fender.

    The color turned out really cool. The candy has a definite pop that, unfortunately, you can't really see from the picture. When the bike is in the shade it looks like a dark, blood red and when it's in the direct sunlight, the gold and metallics pop through and it looks like a burnt orange.